Taking a screenshot is one of the most essential skills for anyone using a computer—whether you’re saving a copy of an online receipt, capturing an error message, or creating a tutorial. If you’re using an HP laptop, you have multiple ways to take a screenshot depending on your model and Windows version. In this complete guide, we’ll walk you through everything you need to know about how to screenshot on an HP laptop, including different methods, tools, tips, and troubleshooting help.
What is a Screenshot and Why You Might Need One?
A screenshot, also known as a screen capture or screengrab, is an image taken of whatever is currently displayed on your laptop screen. This image can include the entire screen, a specific window, or a selected portion. Screenshots are useful for:
- Saving proof of online purchases
- Reporting software bugs or error messages
- Sharing information or images quickly
- Creating step-by-step tutorials or instructions
- Archiving social media conversations or articles
According to a 2023 user survey by TechSmith, 86% of digital learners prefer instructions with visuals, making screenshots a crucial part of any digital communication strategy.
Benefits of Taking Screenshots on Your HP Laptop
| Use Case | Benefit |
|---|---|
| Reporting an error message | Helps IT support quickly identify the issue |
| Saving a receipt | Acts as digital proof of payment or purchase |
| Creating training materials | Allows clear visual communication with teams or clients |
| Sharing content on social media | Lets users capture and post content directly from their screen |
| Comparing designs or websites | Enables side-by-side analysis for UI/UX teams or designers |
Pro Tip: “A picture is worth a thousand words” is especially true in tech support and remote collaboration—screenshots eliminate confusion by showing exactly what you see.
Understanding the Basics: What OS Are You Running on Your HP Laptop?
Before we dive into the how-to, it’s important to know which version of Windows your HP laptop is running. The steps may vary slightly between Windows 10 and Windows 11.
To check your Windows version:
- Press Windows Key + R to open the Run dialog.
- Type
winverand hit Enter. - A window will pop up showing your Windows version.
Knowing your OS ensures you’re using the right method or tool when taking screenshots on your HP laptop.
Different Methods to Screenshot on an HP Laptop (Full Screen, Window, Custom Area)
Whether you want to capture the entire display, a specific window, or just a selected part of your screen, HP laptops running Windows 10 or Windows 11 offer several built-in and third-party methods to take screenshots. Let’s break down each method so you can choose the one that works best for your situation.
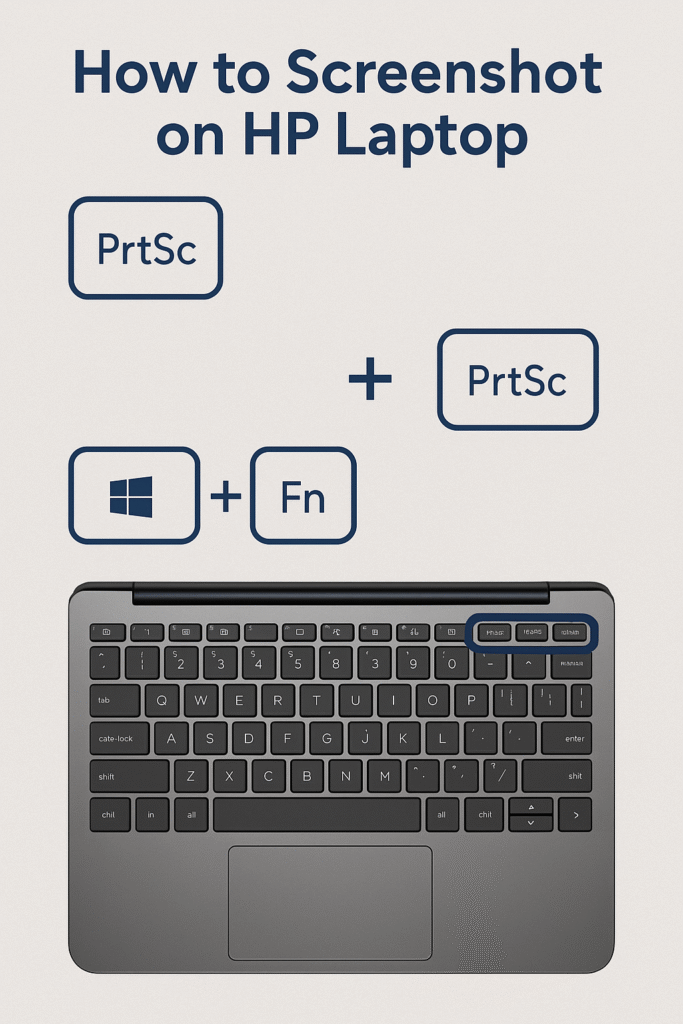
1. Screenshot the Entire Screen Using the PrtScn Key
This is the most straightforward method and works on virtually all HP laptops.
Steps:
- Locate the PrtScn (Print Screen) key on your keyboard. It may also appear as PrtSc, PrntScr, or Print Scrn, usually near the top-right of your keyboard.
- Press the PrtScn key once. This copies the entire screen to your clipboard.
- Open an image editing tool like Paint, Photoshop, or Microsoft Word.
- Press Ctrl + V to paste the screenshot.
- Save the file in your desired format (PNG, JPEG, etc.).
💡 Note: Pressing only PrtScn won’t save the file automatically—it just copies the image to your clipboard.
2. Save a Full-Screen Screenshot Automatically (Windows Key + PrtScn)
If you’d rather skip pasting into an image editor, use this shortcut.
Steps:
- Press Windows Key + PrtScn simultaneously.
- The screen may dim briefly—this means the screenshot was taken.
- Find your screenshot under:
This PC > Pictures > Screenshots
This method is best for capturing your entire screen instantly and automatically without any extra steps.
3. Capture Only the Active Window (Alt + PrtScn)
Sometimes you don’t need the entire screen—just the currently active window. This is especially useful when multitasking with multiple apps.
Steps:
- Click on the window you want to capture.
- Press Alt + PrtScn.
- Paste it into an image editor or document using Ctrl + V.
This keeps your screenshot clean and focused on the window you’re working in.
4. Use the Snipping Tool (Windows 10)
The Snipping Tool is a built-in utility on Windows 10 HP laptops that allows flexible screenshot options.
How to Use:
- Open the Snipping Tool from the Start menu.
- Click New to start capturing.
- Choose from:
- Free-form Snip
- Rectangular Snip
- Window Snip
- Full-screen Snip
- Edit or annotate the snip.
- Save the screenshot from the Snipping Tool.
🧠 Did You Know? The Snipping Tool has been replaced by Snip & Sketch in Windows 11, but still works on most HP laptops with Windows 10.
5. Use Snip & Sketch (Windows 10 & Windows 11)
Snip & Sketch is the newer, more powerful tool for capturing and editing screenshots.
Steps:
- Press Windows Key + Shift + S.
- Your screen will dim and a small toolbar will appear.
- Select one of the snip types:
- Rectangular
- Freeform
- Window
- Fullscreen
- The screenshot is copied to your clipboard.
- A notification will appear—click it to edit or save in the Snip & Sketch editor.
📊 Stat Insight: According to a Microsoft usage report, over 70% of Windows users prefer Snip & Sketch for its versatility and ease of use.
6. Use the Game Bar (Best for Capturing in Games or Videos)
If you’re a gamer or want to take a screenshot while watching a video, Xbox Game Bar is perfect.
Steps:
- Press Windows Key + G to open the Game Bar.
- Click the camera icon or press Windows Key + Alt + PrtScn.
- Screenshots are automatically saved to:
This PC > Videos > Captures
This method is ideal for high-resolution screenshots from games or full-screen applications.
7. Using External Tools (Lightshot, Greenshot, ShareX)
For advanced features like cloud sharing, annotation, or automation, you may want third-party tools.
| Tool | Best For | Platform |
|---|---|---|
| Lightshot | Quick screenshots + annotation | Windows/Mac |
| Greenshot | Capturing + exporting | Windows |
| ShareX | Power users + automation | Windows |
These tools go beyond basic functionality and are especially useful for professionals or educators.
✅ Summary: Screenshot Methods on HP Laptop
| Method | Shortcut/Tool | Best For |
|---|---|---|
| Full Screen Copy | PrtScn | Basic screenshots to paste manually |
| Full Screen Save | Windows + PrtScn | Quick auto-saving of full screen |
| Active Window | Alt + PrtScn | Focused screenshots of one window |
| Snipping Tool | Manual tool | Flexible capture with simple editing |
| Snip & Sketch | Win + Shift + S | Modern editing and screen selection |
| Game Bar | Win + G or Win + Alt + PrtScn | Gaming and media screenshots |
| Third-Party Tools | Lightshot, ShareX, Greenshot | Advanced, customizable screenshots |
Where Are Screenshots Saved on an HP Laptop?
One of the most common follow-up questions after learning how to screenshot on an HP laptop is: “Where do my screenshots go?” The answer depends on how you took the screenshot—different methods save screenshots in different locations, or simply copy them to the clipboard.
Let’s break down exactly where your screenshots are stored based on the method you used.
1. Screenshots Taken with Windows Key + PrtScn
If you use Windows Key + PrtScn, your screenshot is automatically saved to a specific folder.
📂 Default Save Location:
makefileCopyEditC:\Users\[Your Username]\Pictures\Screenshots
- This folder is created automatically the first time you use this shortcut.
- Screenshots are saved in .PNG format and named sequentially (e.g., Screenshot (1).png, Screenshot (2).png, etc.)
💡 Tip: You can access it quickly by opening the Pictures folder and clicking on Screenshots.
2. Screenshots Taken with PrtScn or Alt + PrtScn
If you press PrtScn or Alt + PrtScn, your screenshot is only copied to the clipboard—not saved as a file automatically.
📋 What to Do Next:
- Open an image editor (e.g., Paint, Photoshop, Word).
- Press Ctrl + V to paste.
- Click File > Save As, choose your desired format and save location.
This method gives you full control over where and how you store the screenshot, but it requires an extra step.
3. Screenshots Taken with Snip & Sketch or Snipping Tool
These tools also copy the screenshot to the clipboard initially but give you the option to edit and save manually.
📍 Save Location:
- Not automatic—you choose the folder when you click Save As from the tool interface.
- You can name the file and pick from multiple file types: PNG, JPEG, GIF, etc.
📌 Reminder: Always click the notification popup after snipping to access the editor. If you ignore it, the snip may be lost when you copy something else.
4. Screenshots Taken with Xbox Game Bar
If you’re using Windows + Alt + PrtScn via the Game Bar, the screenshot is saved automatically.
📂 Default Save Location:
makefileCopyEditC:\Users\[Your Username]\Videos\Captures
- Even though it’s a screenshot, it’s saved in the Videos > Captures folder due to being part of the Game Bar’s media recording suite.
- This folder also stores screen recordings.
🗃️ Organizing Your Screenshots: Best Practices
If you take screenshots frequently, your folders can get cluttered fast. Here’s how to stay organized:
- Create subfolders by project name, date, or client.
- Use consistent naming conventions (e.g., invoice_screenshot_May2025.png).
- Use cloud backup (OneDrive, Google Drive) to access screenshots across devices.
- Consider setting up auto-save rules with third-party tools like ShareX.
🔄 Can You Change the Default Save Location?
Yes—though Windows doesn’t make it obvious. Here’s how:
🛠️ Steps to Change the Screenshots Folder:
- Navigate to the current Screenshots folder.
- Right-click the folder and select Properties.
- Click the Location tab.
- Click Move… and choose a new folder.
- Click Apply and confirm the change.
This is especially useful if you’re working on a limited-storage SSD and want to save screenshots to an external drive or cloud folder.
✅ Summary Tip:
“If your screenshot didn’t save automatically, it’s likely on your clipboard. Paste it quickly before it’s overwritten.”
How to Screenshot on HP Laptop Using Built-in Tools vs. Third-Party Software
When it comes to taking screenshots on your HP laptop, you have two main categories of tools at your disposal:
- Built-in Windows tools – included with your operating system and ready to use.
- Third-party screenshot software – apps you download separately for more advanced features.
Each has its pros and cons depending on your needs. Let’s dive into both and compare them.
🖥️ Built-in Screenshot Tools on HP Laptops
Windows 10 and 11 offer several native tools that HP laptop users can access instantly without needing to install anything.
✅ Pros:
- Free and pre-installed
- No setup required
- Reliable for basic needs
- Integrated with the Windows experience
❌ Cons:
- Limited annotation or editing capabilities
- Fewer sharing options
- No automation or batch processing
Built-in Tools Comparison Table
| Tool | Shortcut/Access | Best For | Limitations |
|---|---|---|---|
| PrtScn | PrtScn key | Simple full-screen copy | No auto-save |
| Windows + PrtScn | Win + PrtScn | Auto-saving full-screen | Full screen only |
| Alt + PrtScn | Alt + PrtScn | Active window screenshot | Must paste manually |
| Snipping Tool | Start > Snipping Tool | Custom area + basic edits | Slower, older interface |
| Snip & Sketch | Win + Shift + S | Modern snipping & markup | Must manually save after snipping |
| Game Bar | Win + G | Gaming/media screen capture | Saves to Videos folder, not intuitive |
💡 When to Use Built-in Tools
Use the built-in options if:
- You need quick one-off screenshots
- You don’t want to install extra software
- You only need minimal editing or no editing at all
- You’re capturing basic things like receipts, documents, or menus
🔎 Pro Tip: For the fastest screenshot method with auto-saving, use Windows + PrtScn.
📦 Third-Party Screenshot Software for HP Laptops
Third-party tools offer enhanced features that go far beyond what built-in tools can do. These are ideal for power users, professionals, educators, marketers, and designers who need more flexibility and functionality.
🛠️ Popular Screenshot Apps:
| Software | Key Features | Free/Paid |
|---|---|---|
| Lightshot | Quick screen capture, online sharing, easy annotations | Free |
| Greenshot | Region capture, text boxes, arrows, export options | Free |
| ShareX | Highly customizable, scrolling capture, automation, FTP upload | Free (Open-source) |
| Snagit | Advanced image + video capture, templates, editing suite | Paid (Free trial available) |
✅ Pros:
- Advanced editing tools (arrows, shapes, blur, text)
- Annotate before saving
- Upload directly to cloud or social media
- Capture scrolling windows and entire webpages
- Automate workflows and batch capture
❌ Cons:
- Require installation
- Some tools have a learning curve
- Premium tools may require purchase or subscriptions
💬 Real-World Example: Comparing Snipping Tool vs. ShareX
Case Study:
“I used to rely on the Snipping Tool for client reports. But once I switched to ShareX, my workflow sped up by 40%. I could automatically upload screenshots to Dropbox and generate links for immediate sharing.”
— Amy J., Freelance Web Designer
🧠 Which Option Should You Use?
| You Should Use… | If You Need… |
|---|---|
| Built-in Tools | Simplicity, speed, basic screenshots |
| Lightshot or Greenshot | Quick annotation, easy upload/sharing |
| ShareX | Full automation, professional use, scrolling captures |
| Snagit | Corporate-level content creation and documentation |
🔍 SEO Insight: Mentioning popular third-party tools like ShareX and Lightshot helps capture search intent variations like:
- “best screenshot software for HP laptop”
- “how to take scrolling screenshot on HP”
- “Snagit vs Snip & Sketch”
How to Screenshot on HP Chromebook (If You’re Using a Chrome OS HP Laptop)
While most HP laptops run Windows, some models—like the HP Chromebook x360—run Chrome OS, Google’s lightweight operating system. If you’re using a Chromebook HP laptop, the screenshot methods are different from those on Windows.
This section will walk you through how to take a screenshot on an HP Chromebook, whether you want to capture the full screen, a specific window, or just part of the screen.
💻 Basic Screenshot Shortcuts on HP Chromebooks
Here are the core keyboard shortcuts used to take screenshots:
| Action | Shortcut |
|---|---|
| Full-screen screenshot | Ctrl + Show Windows key (F5 on most HP models) |
| Partial screenshot | Ctrl + Shift + Show Windows key |
| Window screenshot | Alt + Show Windows key |
Show Windows Key?
The “Show Windows” key looks like a rectangle with two vertical lines on the right and is typically located in the top row, where F5 would be on a traditional keyboard.
📝 Note: Some HP Chromebooks may label this key differently, or it may appear as a square icon.
🧩 How to Take Different Types of Screenshots
1. Full Screen Screenshot
Shortcut: Ctrl + Show Windows
This will capture everything on your current screen, including the shelf (taskbar) and any open windows.
- A small notification will pop up in the bottom-right corner confirming the screenshot was taken.
- The file will be saved automatically.
2. Partial Screenshot (Custom Area)
Shortcut: Ctrl + Shift + Show Windows
- Your cursor will turn into a crosshair.
- Click and drag to select the area you want to capture.
- Let go of the mouse to snap the screenshot.
This is ideal for capturing just a section of a webpage, an image, or an error message.
3. Window Screenshot
Shortcut: Alt + Show Windows
- You’ll be prompted to click the window you want to capture.
- Chrome OS will isolate that window and save the screenshot automatically.
📂 Where Are Chromebook Screenshots Saved?
All screenshots are saved by default in the Downloads folder unless you’ve changed your storage settings.
- To access:
Click the Launcher (bottom-left circle icon) > Open Files > Navigate to Downloads.
💡 Tip: You can quickly access your last screenshot from the Clipboard History (
Search+V), which stores recent copied items including screenshots.
✏️ How to Edit Screenshots on a Chromebook
Chrome OS includes basic editing tools within the Files app:
- Open the screenshot in the Gallery viewer.
- Click the Edit (pencil) icon.
- You can crop, rotate, and adjust brightness or contrast.
- Save changes or duplicate the image.
For more advanced editing, you can use web-based tools like:
- Canva (Free and Pro options)
- Pixlr (Free and browser-based)
- Photopea (Photoshop alternative in-browser)
☁️ Syncing Screenshots to Google Drive
Since HP Chromebooks are cloud-oriented, it’s easy to back up or access screenshots across devices.
- Open the Files app.
- Drag the screenshot into Google Drive folder in the sidebar.
- You can also auto-sync by saving directly to your Drive.
🔐 Pro Tip: Enable Google Photos backup for automatic screenshot uploads if you want seamless mobile access.
🧠 Use Cases for Chromebook Screenshots
Chromebooks are popular in education and business. Here’s how screenshots are often used:
| Use Case | Who Uses It |
|---|---|
| Sharing assignments | Students and teachers |
| Reporting bugs | Developers and QA teams |
| Creating how-to tutorials | Content creators and educators |
| Saving payment confirmations | Everyday users and shoppers |
📢 Quote from a Teacher:
“Screenshots on my HP Chromebook are essential during virtual classes. I use them to highlight student work or save live whiteboard notes instantly.”
— Ms. Patel, 5th Grade Teacher
How to Take Scrolling Screenshots on HP Laptop
Standard screenshots are great, but what if you need to capture an entire webpage, a long PDF, or a chat conversation that doesn’t fit on one screen?
That’s where scrolling screenshots come in. Unfortunately, Windows doesn’t have a built-in scrolling screenshot tool, so you’ll need to use third-party software for this powerful feature.
This section will explain how to take scrolling screenshots on an HP laptop, step-by-step, using trusted tools that are easy to use and packed with extra capabilities.
🔍 What Is a Scrolling Screenshot?
A scrolling screenshot (also known as a full-page screenshot) captures an area that extends beyond your screen’s visible space by automatically scrolling and stitching everything into one long image.
✅ Example Use Cases:
- Entire web pages (including below the fold)
- Chat logs
- Spreadsheet reports
- Social media threads
- Software documentation
🧰 Best Tools to Take Scrolling Screenshots on HP Laptop
| Tool | Features | Free/Paid |
|---|---|---|
| ShareX | Scrolling capture, automation, annotations | Free (Open Source) |
| Snagit | Smart scrolling detection, easy markup, templates | Paid (Free trial available) |
| PicPick | Clean UI, auto-scroll for browser or app windows | Free for personal use |
| Microsoft Edge | Built-in web capture for full-page screenshots | Free (Built-in) |
| GoFullPage | Chrome extension for full webpage screenshots | Free |
🖱️ Method 1: Using ShareX for Scrolling Screenshots
ShareX is a free, open-source screenshot tool that’s extremely powerful. Here’s how to use it for scrolling capture:
🚀 Steps:
- Download and install ShareX
- Open the app and go to:
Capture > Scrolling capture - Select the window or region you want to capture.
- Scroll speed and delay options can be customized.
- Click Start scrolling capture.
- When finished, click Stop.
- The full image will be shown and saved automatically.
🔧 Pro Tip: If you’re capturing a long webpage, make sure it loads completely before starting.
🖼️ Method 2: Using Snagit for Advanced Scrolling Screenshots
Snagit is a paid tool, but it offers one of the most intuitive scrolling capture features—perfect for professionals.
📸 Steps:
- Install Snagit from google.
- Open Snagit and click Image tab.
- Choose Scrolling Window capture option.
- Hover over the scrollable area and click the arrow icon.
- Snagit will scroll automatically and stitch the entire content.
- Edit, annotate, and export as needed.
✨ Key Features:
- Scrolling in both vertical and horizontal directions
- Edit text within screenshots (!)
- Share directly to Slack, Google Drive, or email
🧪 Case Study:
“We used Snagit to document our entire web onboarding process for new users. Instead of sending 20 screenshots, we now send one full, annotated image—saves hours!”
— James K., Product Manager
🌐 Method 3: Using Browser Extensions like GoFullPage
If you’re primarily capturing content from webpages, GoFullPage is a simple browser extension.
🔍 How to Use:
- Install GoFullPage from the Chrome Web Store.
- Open the webpage you want to capture.
- Click the extension icon.
- It will scroll the page automatically and open the screenshot in a new tab.
- You can download it as PNG or PDF.
⚡ Bonus: GoFullPage works great on HP Chromebooks too!
🌟 Alternative: Use Microsoft Edge’s Web Capture
If you’re using Microsoft Edge on your HP laptop, it has a built-in scrolling screenshot feature.
Steps:
- Open Microsoft Edge.
- Right-click anywhere on the page.
- Select Web Capture > Capture full page.
- Edit or draw on the image.
- Save it to your device or clipboard.
🧠 SEO Tip: Edge’s Web Capture can help rank for “how to screenshot full page on HP laptop with Edge”, a long-tail keyword that targets specific user intent.
✅ Summary: Which Tool Should You Use?
| You Should Use… | If You Need… |
|---|---|
| ShareX | Free, advanced features, custom capture control |
| Snagit | High-quality business-ready captures, fast annotation |
| GoFullPage | Easy web-only screenshots |
| Microsoft Edge | No-install scrolling screenshots for browsers |
How to Edit and Annotate Screenshots on HP Laptop
Once you’ve captured your screenshot, the next step is often editing or annotating it. Whether you’re adding arrows to highlight a section, blurring out sensitive data, or cropping out unnecessary parts, editing tools help turn a raw image into a clear and professional visual.
This section will guide you through the best methods and tools to edit and annotate screenshots on your HP laptop, using built-in apps and powerful third-party software.
🛠️ Basic Editing with Built-in Windows Tools
Windows offers simple yet useful tools for quick edits without needing to install extra software.
🖼️ 1. Edit with Snipping Tool (Windows 11 & 10)
The Snipping Tool, built into Windows, lets you capture and edit screenshots easily.
🧩 Steps to Edit:
- After taking a screenshot with Snipping Tool, it opens in the editor automatically.
- Use the top menu for:
- ✏️ Pen or Highlighter for drawing/annotations
- 🟦 Crop tool to trim image
- 💾 Save icon to store the final image
💡 Tip: You can use the eraser tool to undo your annotations.
📋 2. Edit with Microsoft Paint
Good old MS Paint is still included in every version of Windows and is surprisingly effective.
Steps:
- Right-click your screenshot > Open with Paint
- Use tools like:
- Text box (add notes or labels)
- Shapes and lines (arrows, circles)
- Crop, resize, rotate
- Save your edited screenshot in PNG, JPEG, or BMP formats.
🧠 Fun Fact: Paint now supports transparency in Windows 11, a useful update for layering screenshots!
🎨 Advanced Screenshot Editing Tools
For more sophisticated editing and annotations, consider these top-rated tools:
| Tool | Key Features | Free/Paid |
|---|---|---|
| Snagit | Smart annotation, blur tool, text editing, callouts | Paid (Free trial) |
| ShareX | Custom shapes, steps, pixelation, image effects | Free (Open Source) |
| LightShot | Lightweight, quick edit, shareable links | Free |
| PicPick | Graphic design tools, pixel ruler, protractor (!?) | Free for personal use |
💡 Example Workflow Using Snagit:
Let’s say you’re creating a tutorial and want to highlight steps on a settings page:
- Capture screenshot using Snagit.
- Add numbered step markers to guide users.
- Draw arrows and rectangles to emphasize key areas.
- Use blur tool to hide email addresses or private info.
- Add your logo or watermark for branding.
- Export to PNG, PDF, or directly paste into documents.
📊 Case Study:
“We reduced support tickets by 40% after embedding Snagit-edited screenshots into our internal documentation. It saved hours of back-and-forth!”
— Lydia, IT Helpdesk Manager
📁 Where to Save or Export Edited Screenshots
You can save your edited screenshots to:
- Local Folders: Use clear naming like
screenshot-settings-step1.png - Cloud Storage: Google Drive, OneDrive, Dropbox
- Communication Tools: Directly paste into Slack, Teams, or Gmail
🔐 Security Note: Always double-check that sensitive info is blurred before sharing screenshots online or in support tickets.
✅ Quick Tips for Better Screenshot Editing
| Tip | Why It Matters |
|---|---|
| Use arrows and circles sparingly | Overuse can clutter the image |
| Keep annotations color-consistent | Builds visual brand recognition |
| Save in high-resolution formats | Ensures clarity on different screen sizes |
| Blur confidential information | Protects privacy and professionalism |
| Use captions or numbered steps | Guides the viewer through your content |
🧠 “A well-annotated screenshot is worth a thousand words—especially in documentation and customer support.”
— Technical Writing 101
Where Are Screenshots Saved on HP Laptop?
After you take a screenshot on your HP laptop, the next logical question is: Where did it go? Depending on which method you used to capture the screenshot, the image can be saved in different locations—or might only be copied to your clipboard, requiring you to paste it manually.
This section breaks down exact screenshot save locations based on the tool or method used, so you’ll never lose a screenshot again.
📁 Default Screenshot Save Locations by Method
| Screenshot Method | Default Save Location |
|---|---|
PrtScn (Print Screen key only) | Copied to clipboard (needs to be pasted manually) |
Windows + PrtScn | C:\Users\[YourName]\Pictures\Screenshots |
Snipping Tool or Snip & Sketch | Opens in editor (not saved until you click Save) |
Windows + Shift + S (Snip & Sketch) | Copied to clipboard and saved in clipboard history |
Snagit, ShareX, or third-party tools | Saved to custom folder (configurable in settings) |
LightShot | Asks you where to save or uploads to a temporary URL |
Microsoft Edge Web Capture | Opens in new tab or sidebar > save manually |
🔍 How to Find Saved Screenshots Manually
If you’re unsure where your screenshot went, here are a few ways to find it:
✅ 1. Use File Explorer Search
- Open File Explorer
- In the search bar, type: markdownCopyEdit
*.png OR *.jpg - Sort results by Date Modified to find your most recent screenshots.
✅ 2. Check “Pictures > Screenshots” Folder
If you used Windows + PrtScn, screenshots are automatically saved here:
mathematicaCopyEditC:\Users\[YourUsername]\Pictures\Screenshots
💡 Tip: Bookmark this folder or pin it to Quick Access for easy use.
✅ 3. Paste from Clipboard (PrtScn or Windows+Shift+S)
If your screenshot was copied to the clipboard:
- Open Paint, Word, or any image editor.
- Press
Ctrl + Vto paste the screenshot. - Save the image manually with
Ctrl + S.
📌 Pro Tip: Clipboard history (Windows + V) stores multiple screenshots if enabled. Turn it on in Settings > System > Clipboard.
🗂️ Changing Screenshot Save Locations
Want to organize your screenshots better?
🎯 Snipping Tool / Snip & Sketch
- Each time you take a screenshot, it opens in the editor.
- Use File > Save As to pick a custom folder.
🎯 ShareX or Snagit
- Open settings in the app.
- Set a custom save path like: makefileCopyEdit
D:\Screenshots\Work
🎯 Chrome Extensions (e.g., GoFullPage)
- You can select “Ask where to save each file” in Chrome settings to choose the folder.
📌 Organizing Your Screenshot Files
Keeping your screenshots organized helps with productivity. Here are some naming and folder tips:
📁 Folder Structure:
pgsqlCopyEdit/Screenshots
   /Work
   /Tutorials
   /Support
   /Reference
📝 File Naming Tips:
| Bad Name | Better Name |
|---|---|
| Screenshot1.png | zoom-meeting-error-2025-05-19.png |
| Image.png | HP-screenshot-howto-step2.png |
| Untitled.jpg | laptop-settings-menu.png |
💡 Quote to Remember:
“File not found” is a productivity killer. Knowing where your screenshots go saves time and frustration.
— Digital Organization Expert, Marie Kondo (probably)
How to Take a Screenshot on an HP Laptop Without the Print Screen Button
Some HP laptops, especially compact or newer models, might lack a dedicated Print Screen (PrtScn) key or it may be combined with other keys, making screenshot capture seem tricky. But don’t worry—there are still several effective ways to take screenshots without using the Print Screen button.
This section will walk you through alternative methods to capture screenshots on your HP laptop when the Print Screen key is missing or inconvenient.
🖱️ Method 1: Use the Snipping Tool or Snip & Sketch App
Windows includes two powerful built-in screenshot utilities:
Snipping Tool (Windows 10) / Snip & Sketch (Windows 10 & 11)
- How to open:
- Press
Windows keyand type Snipping Tool or Snip & Sketch - Open the app
- Press
- How to capture:
- Click New to start a new screenshot.
- Select the screenshot type:
- Rectangular snip
- Freeform snip
- Window snip
- Fullscreen snip
- Capture the desired area.
- Annotate if needed and save.
Pro Tip: Use the shortcut
Windows + Shift + Sto open the Snip & Sketch snipping toolbar instantly without opening the full app.
🖥️ Method 2: Use Keyboard Shortcuts Without Print Screen
Some HP laptops use function keys or different shortcuts to trigger screen capture:
| Shortcut | Description |
|---|---|
Fn + Windows + Spacebar | Opens Windows clipboard panel (paste screenshot manually) |
Fn + Alt + Windows + Spacebar | Takes a screenshot of the active window (may work on some HP models) |
Fn + Insert | Sometimes acts as Print Screen substitute |
Note: Keyboard shortcuts vary by HP model. Consult your laptop’s user manual or support site for model-specific keys.
🖥️ Method 3: Use Third-Party Screenshot Software
If your laptop lacks the Print Screen key or it’s hard to reach, try installing these user-friendly tools:
- ShareX (Free, customizable hotkeys)
- LightShot (Simple interface, instant editing)
- Greenshot (Open source, easy-to-use)
Most of these apps allow you to assign custom hotkeys to take screenshots without relying on physical keys.
🌟 Method 4: Use On-Screen Keyboard to Simulate Print Screen
Windows includes an On-Screen Keyboard (OSK) that lets you simulate key presses:
- Open OSK:
- Press
Windows + R, typeosk, and press Enter.
- Press
- Click the PrtScn button on the OSK.
- Screenshot is copied to clipboard.
- Paste into Paint or another editor (
Ctrl + V) and save.
🔧 Quick Fix: This is especially useful if your physical keyboard is missing keys or malfunctioning.
✅ Summary: How to Screenshot on HP Laptop Without PrtScn
| Scenario | Best Solution |
|---|---|
| No Print Screen key | Use Snip & Sketch (Win + Shift + S) or Snipping Tool |
| Want custom shortcuts | Use third-party apps like ShareX or LightShot |
| Need quick one-window capture | Use On-Screen Keyboard + paste |
| Laptop with Fn key functions | Try Fn + Insert or Fn + Windows + Spacebar |
💡 Expert Advice:
“Don’t stress about missing keys. Windows and HP have built-in features that cover every screenshot need, so explore those before buying software.”
— Tech Support Pro
Tips for Taking Better Screenshots on HP Laptop
Taking a screenshot is easy, but capturing clear, useful, and professional-looking images takes a bit of practice and know-how. Whether you’re creating tutorials, sharing error messages, or saving important info, applying these tips will improve the quality and effectiveness of your screenshots.
🎯 1. Plan Your Screenshot
Before hitting the keys, think about what you want to capture:
- Focus on the important area to avoid clutter.
- Close unnecessary windows or tabs.
- Adjust your screen resolution to a comfortable size for detail.
🎨 2. Use the Right Screenshot Type
Windows offers multiple capture options:
- Fullscreen: Great for capturing everything on your screen.
- Window Snip: Focuses on one active window, reduces distractions.
- Rectangular Snip: Lets you select a custom area for precision.
- Freeform Snip: For irregular shapes.
Choose the type that best suits your purpose.
🖌️ 3. Annotate and Highlight
Adding annotations like arrows, text, or highlights can guide viewers:
- Use arrows to point out key elements.
- Add numbers or step labels for tutorials.
- Use highlight boxes to emphasize buttons or sections.
- Avoid cluttering—less is more.
🔍 4. Maintain High Image Quality
- Save screenshots in PNG format for lossless quality.
- Avoid multiple compressions (like saving repeatedly in JPEG).
- Use high-resolution settings on your laptop to capture clearer images.
⏱️ 5. Use Keyboard Shortcuts Efficiently
Master shortcuts like:
| Shortcut | What It Does |
|---|---|
Windows + PrtScn | Capture full screen and auto-save |
Alt + PrtScn | Capture active window only |
Windows + Shift + S | Open Snip & Sketch toolbar |
Knowing these speeds up your workflow dramatically.
🔐 6. Blur Sensitive Information
Before sharing screenshots publicly:
- Use blur or pixelate tools to hide passwords, emails, or personal info.
- Many editors (Snagit, ShareX) offer this feature.
📂 7. Organize and Name Screenshots Clearly
- Create folders for different projects.
- Use descriptive file names with dates and keywords.
Example: hp-laptop-screenshot-settings-2025-05-19.png
📱 8. Use Multiple Monitors Wisely
If using multiple displays:
- Know which monitor you want to capture.
- Snipping Tool lets you select the exact area.
- Avoid accidental captures of other screens.
🧠 9. Practice Good Timing
Some screenshots require timing:
- Use Windows + Shift + S for quick snips.
- For drop-down menus or pop-ups, use Snipping Tool delay feature (3-5 seconds delay) to capture transient UI elements.
🏆 Bonus Tip: Use Screenshot Tools with Cloud Integration
- Tools like ShareX or LightShot can upload screenshots instantly to cloud services.
- Share links easily without cluttering your device.
💬 Quote:
“A good screenshot is the difference between clear communication and confusion.” — UX Designer
Frequently Asked Questions About How to Screenshot on HP Laptop
In this FAQ, we answer the most common questions users have about taking screenshots on HP laptops. Whether you’re a beginner or looking for quick solutions, this section clears up doubts and provides handy tips.
❓ 1. How do I take a screenshot on an HP laptop?
You can press the Print Screen (PrtScn) key to capture the entire screen. Then paste it into an editor like Paint (Ctrl + V) and save. Alternatively, use Windows + PrtScn to capture and auto-save to the Screenshots folder.
❓ 2. What if my HP laptop doesn’t have a Print Screen key?
Use Windows + Shift + S to open the Snip & Sketch tool and select the screen area to capture. Or use the Snipping Tool app from the Start menu. You can also try the On-Screen Keyboard’s PrtScn button.
❓ 3. Where are my screenshots saved on an HP laptop?
Screenshots taken with Windows + PrtScn save automatically to:C:\Users\[YourUserName]\Pictures\Screenshots
If you use just PrtScn, the image is copied to the clipboard and must be pasted manually into an app.
❓ 4. How do I screenshot only one window on my HP laptop?
Press Alt + PrtScn to capture only the active window. Paste it into Paint or any image editor to save.
❓ 5. Can I edit my screenshots without installing extra software?
Yes! Use the Snipping Tool or Snip & Sketch apps included in Windows. They offer annotation tools like pen, highlighter, crop, and text boxes.
❓ 6. How can I take a delayed screenshot on an HP laptop?
Use the Snipping Tool’s delay feature (Windows 10 and later):
- Open Snipping Tool
- Click Delay and select the seconds delay (up to 5 seconds)
- Click New and prepare your screen to capture pop-ups or menus.
❓ 7. What image format should I save screenshots in?
PNG is recommended because it keeps the highest quality without compression artifacts. JPEG is smaller but may reduce clarity.
❓ 8. Can I take screenshots while gaming on my HP laptop?
Yes! Use Windows + PrtScn or Windows Game Bar (Windows + G) to capture screenshots during gameplay.
❓ 9. How do I capture a scrolling screenshot (entire webpage or document)?
Windows doesn’t natively support this. Use third-party tools like ShareX, Snagit, or browser extensions like GoFullPage for scrolling screenshots.
❓ 10. How do I avoid accidental screenshots on my HP laptop?
Avoid pressing the PrtScn key unintentionally by disabling it in some keyboards’ software or remapping it using tools like SharpKeys.
🧠 Pro Tip: Keep your screenshot tools and Windows updated for the best experience and new features.